Last post I ended with a blinking LED, just to verify that uploading code to the ATtiny works. The next step was testing the software SPI routine and actually talking to the MAX7221 ICs.
Nerd Ralph wrote a wonderful
software SPI implementation that I wanted to give a try. And of course it didn't work. Most likely it was something I was doing wrong. The LED displays were not doing anything, so time to bring out the oscilloscope!
Sure enough I was getting some signals out of the ATtiny, but I was missing the clock signal. After some debugging I found a typo I introduced to the SPI code. After fixing that, I got the right signals on the scope:
And of course, the LED displays finally did their magic:
Okay, cool, that works!
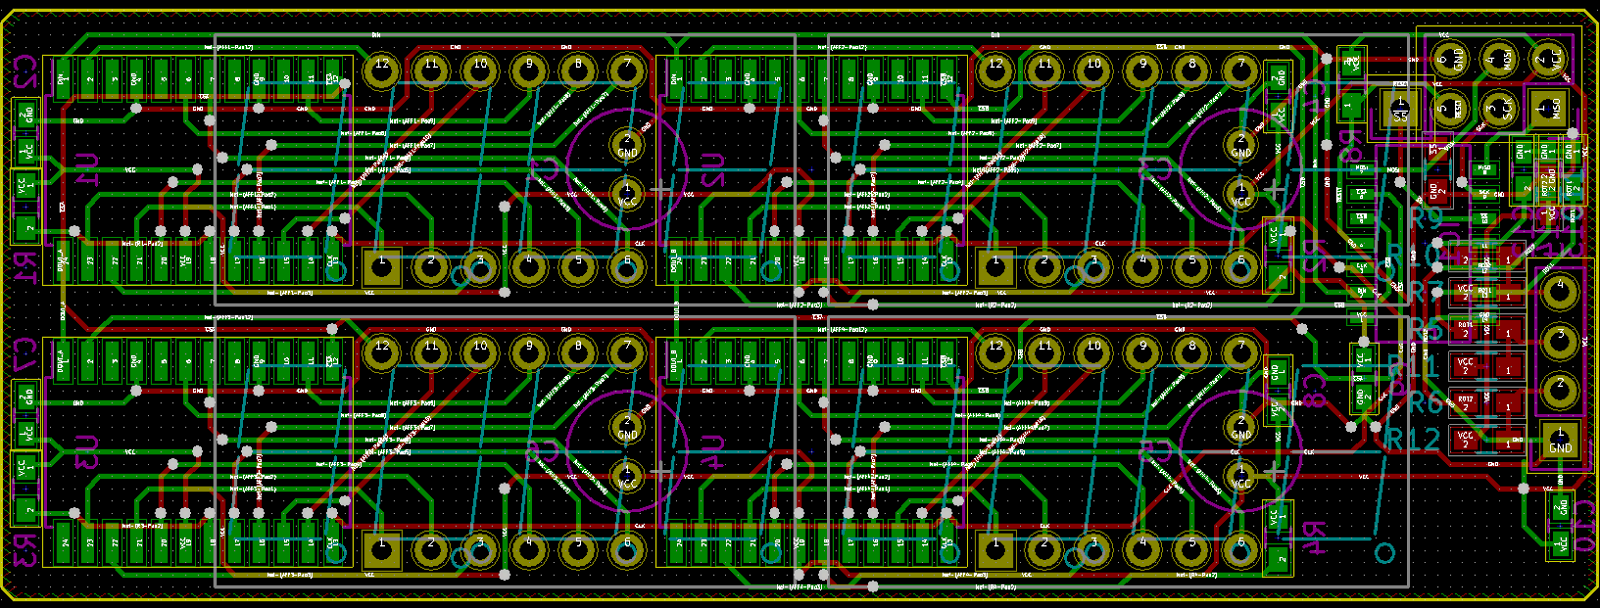
I already had some PCBs designed and manufactured using the same schematics I had on the breadboard.
So it's basically just four MAX7221's wired to an ATtiny24a. The MAX's are daisy chained in two strings of two. I'm using software SPI here because I need the SPI hardware to communicate with the main micro of this project. The ATtiny will act as an SPI slave.
Laying out this board was a nice challenge:
The pin layout of the MAX7221 so does NOT match the pin layout of the LED displays, so there's no way of doing this without a bunch of vias.
There's four displays on the front of the board and a couple of passives for the rotary encoder.
On the back we find the ICs and some more passives. As well as a connector for the rotary encoder and an ICSP header that also doubles as a connector to the main board.
The electrolytic capacitors, displays and connectors are through hole, all the other components are surface mount. The resistors and caps are 0603's. It's tiny, but everything can be soldered by hand. Even by me. And I suck at soldering.
Oh wow, it actually works!
Final shot: the prototype on the breadboard and the completed board next to it.


No comments:
Post a Comment